Microsoft
You can change the background to anything you like in Powerpoint: a picture, a color, a gradient, or even an in-motion video. You’ll know the best background for your presentation, but whatever you want to change it to, we’re here to help you do it.
Here’s how to change the background in Powerpoint to a few different styles.
Don’t have Powerpoint installed already? Here’s how to download it.
How to change the background to a color or gradient
Beyond an empty background, the most simple background you can add to your Powerpoint presentation is a flat color, or a gradient from one color to another. Here’s how to do it.
Step 1: Open your Powerpoint document and select the slide that you want to change the background for, on the left-hand side. In this example, we’re using the standard template for an architectural pitch presentation.
Step 2: Select Design in the top-menu bar.
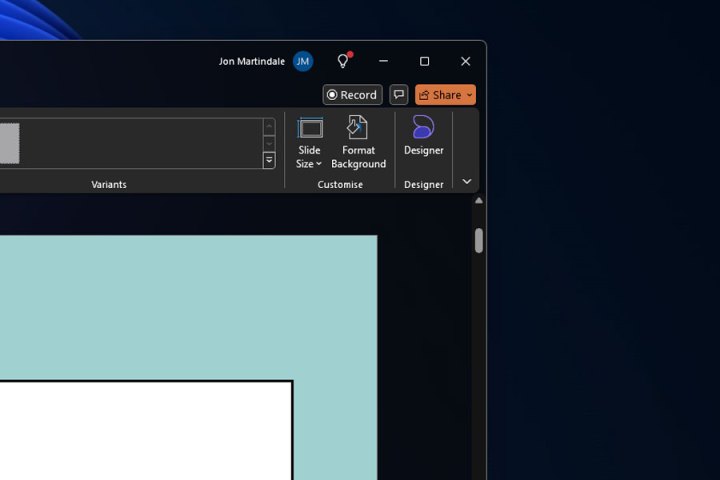
Step 3: Select Format Background in the top right.
Digital Trends
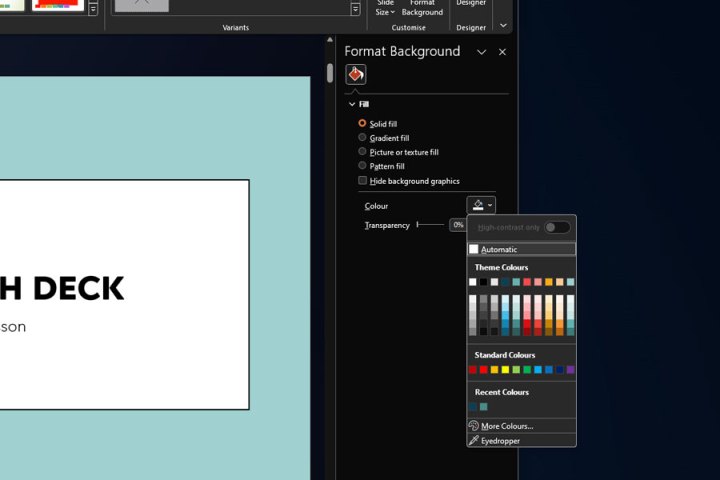
Step 4: From the menu that appears, select either Solid fill or Gradient fill depending on your needs.
Digital Trends
Step 5: If you want a solid color, select the paint can icon and choose your color preference. You can select from a range of curated color options, select More colors for a greater array of options, or use the Eyedropper tool to grab a color from the presentation to use for your background.
You can also adjust the transparency using the slider, to fade the color in and out.
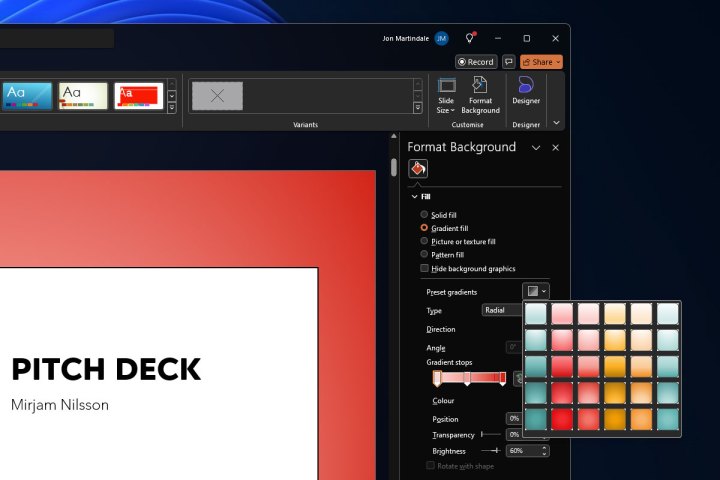
If you want a gradient from one color to another, you can select a Preset gradient between two colors — but you can also fine-tune it using the Gradient stops options to control the number and type of color changes within the gradient. You can also adjust the position, transparency, direction, and brightness of the colors and the gradient itself.
Digital Trends
Step 6: Play around with the option until you’re happy. If you want to start again at any point, select the Reset background button at the bottom of the Format Background menu.
When you’re happy with the result, just close the menu down by selecting the X icon in the top-right corner of the Format Background menu. Alternatively, if you want to apply that gradient or solid-color background to every slide, select the Apple to all button at the bottom of the window.
How to add a picture to the background
Would you rather make an image the background for your presentation’s slide(s)? You can do that too.
Step 1: Select the slide that you want to change the background for, on the left-hand side. Then select Format Background in the top-right.
Step 2: Select Picture or texture fill.
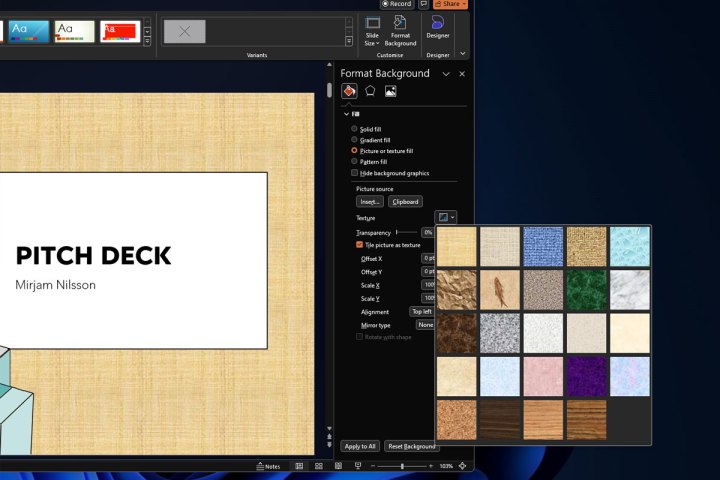
Step 3: If you want to use a texture for the background, select the box next to Texture and choose the texture you want for the background from the pop-out window.
Digital Trends
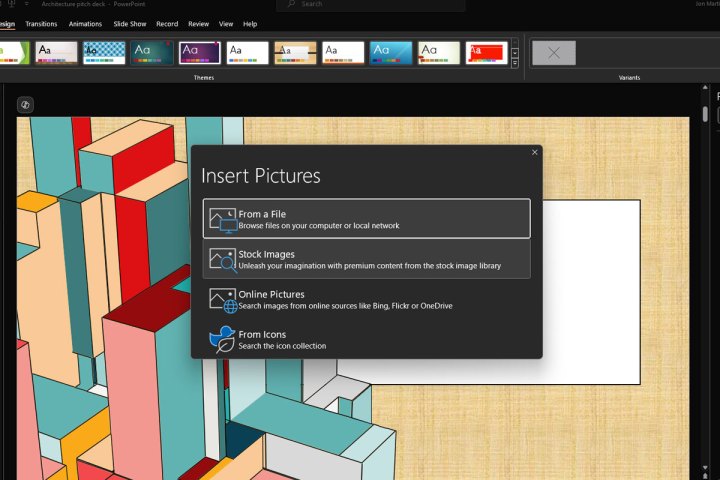
Step 4: If you want to use an image, select the Insert button under the “Picture source” subheading. Then decide where you want to source the image from.
Digital Trends
Step 5: Select From a file if you want to use a local image file, then choose it using the file explorer and select Open. If you’d rather source it online, stock images, or the stack of pre-installed logos, select those and follow the on-screen instructions to introduce the image.
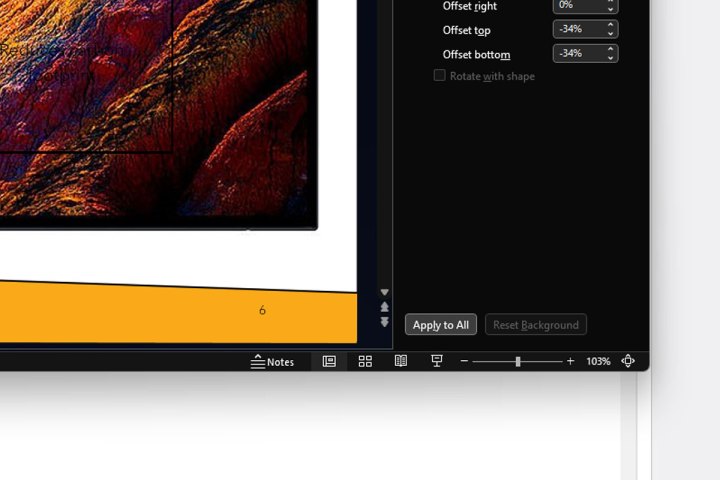
Step 6: If you want the image or texture to appear in the background of all slides, select the Apply to all slides button at the bottom right of the screen.
Digital Trends
How to add a video to the background
Want to really spice up a slide? How about changing the background to a video? Here’s how to do it.
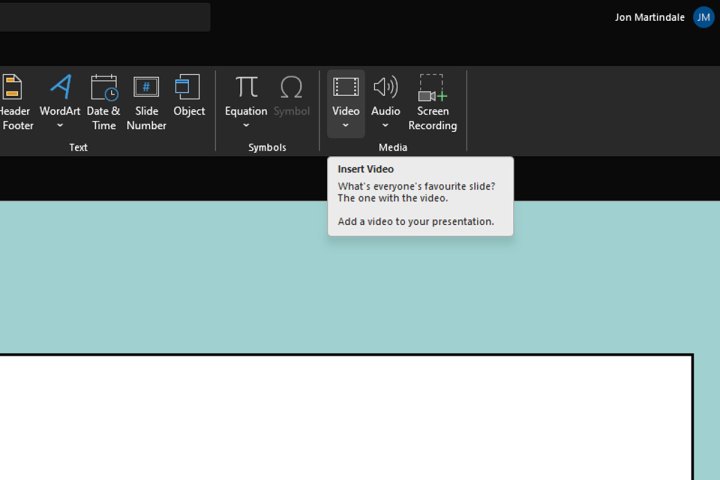
Step 1: Select Insert followed by Video. Choose whether you want to add a video from your local device or an online source. If the former, select it from the file explorer and select Open. If it’s online, paste the URL and select Insert.
In this example, I’m using a clip from the 1988 sci-fi comedy Red Dwarf.
Digital Trends
Step 2: Use your mouse to drag and move the video so that it covers the portion of the slide that you want it to play on (or the whole thing). You can resize it too, using the corner controls by clicking and dragging.
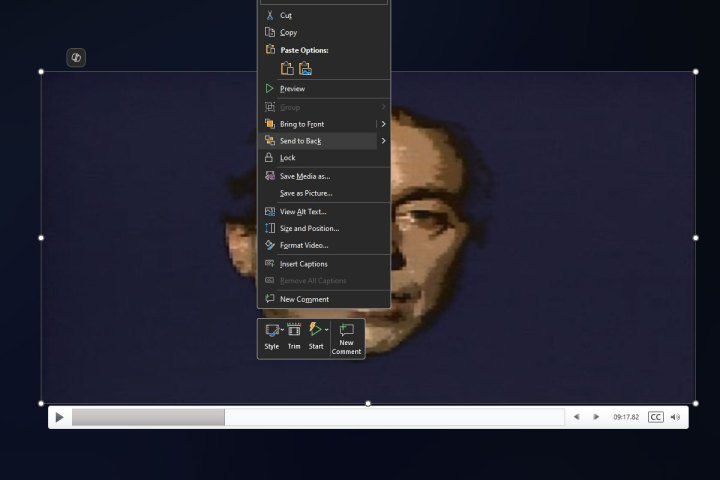
Step 3: Right-click the video and select Send to back.
You can also take this opportunity to use the built-in controls to trim the video if it needs it, choose when you want it to start (automatically, or when clicked on), and its style — whether you want it to appear at an angle or with a fade around it.
Digital Trends
Step 4: When you’re happy with the video’s implementation, select Slideshow at the top, then select either From beginning or From current slide in the top left to check out the presentation to make sure the video is working correctly.
If it’s not in the right position, starts at the wrong point, or isn’t formatted how you’d like it, use the right-click controls on the video to make your adjustments.
Now that you’ve become a master of Powerpoint backgrounds, how about playing around with the new Copilot features? Here are five of the best things you can do with Copilot Pro right now.

