Image used with permission by copyright holder
When you use Microsoft Word to create a document that you plan to share with others, you can go that extra mile by including hyperlinks. You can link to a web page, a file, a place in your document, or an email address. Your readers then simply click the link rather than take extras steps themselves.
Along with being helpful to your readers, links can be beneficial to you as well. They’re great for checking your references, doing more research, opening another file, or navigating your document — just select the link!
Here, we’ll show you how to add hyperlinks in Word to these items.
Link to a web page in Word
Creating a link to a website or specific web page is a good way for your readers to visit a source you mention, or a footnote you have inserted.
Step 1: Select the text in your Word document that you want to link. You can do this by dragging your cursor through it, which highlights it.
Step 2: Go to the Insert tab, select Links > Link, and pick Insert link. Alternatively, right-click the text, move to Link and pick Insert link from the pop-out menu.
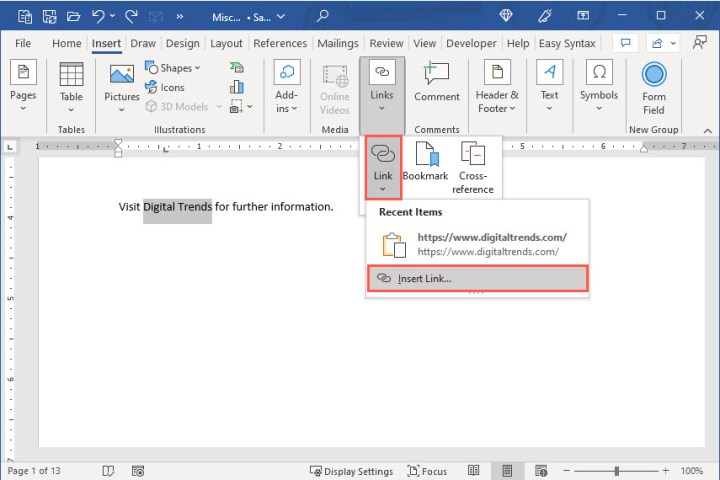
Image used with permission by copyright holder
Step 3: When the Insert Link window opens, choose Existing file or web page on the left.
Step 4: If you recently viewed the page, it may appear in the list for you to select. Pick Browsed pages in the center window and choose the page. It then appears in the Address box.
If you don’t see the page in the list, enter or paste its URL into the Address box.
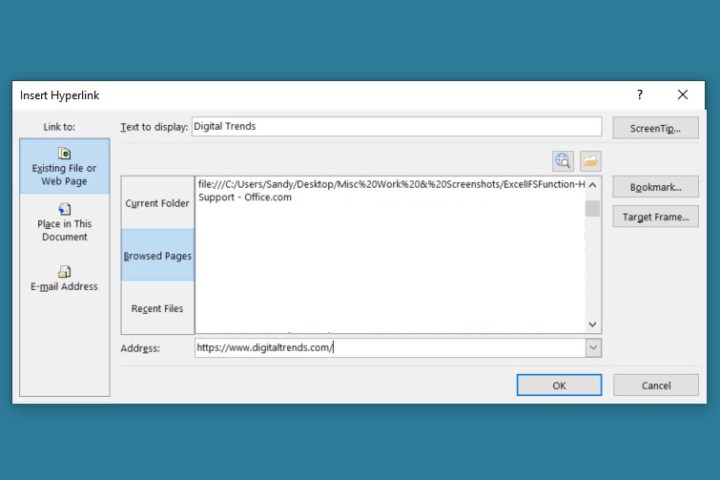
Image used with permission by copyright holder
Step 5: Select OK to apply the link.
Step 6: You’ll then see the text you selected in your document linked, which is blue and underlined. When you select the link, the site or page opens in your default web browser.
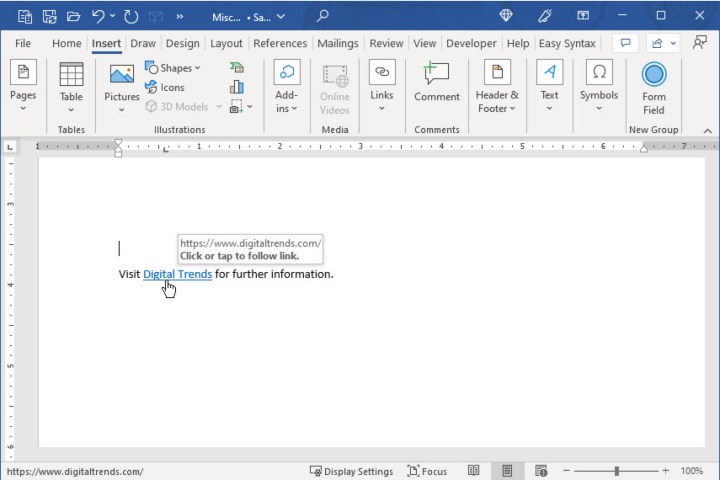
Image used with permission by copyright holder
Link to another file in Word
One way that hyperlinks are helpful to you as the author is by linking to another file, like a document, spreadsheet, or other item that’s related to your current document.
Step 1: Select the text in your Word document that you want to link.
Step 2: Go to the Insert tab, select Links > Link, and pick Insert link or right-click, move to Link and pick Insert link.
Step 3: When the Insert Link window opens, choose Existing file or web page on the left.
Step 4: Select the file by doing one of the following:
- Choose Current folder if the file is in the same folder as the current document and select it.
- Pick Recent files if you recently opened or created the file and select it in the list.
- Enter the full path for the file in the Address box.
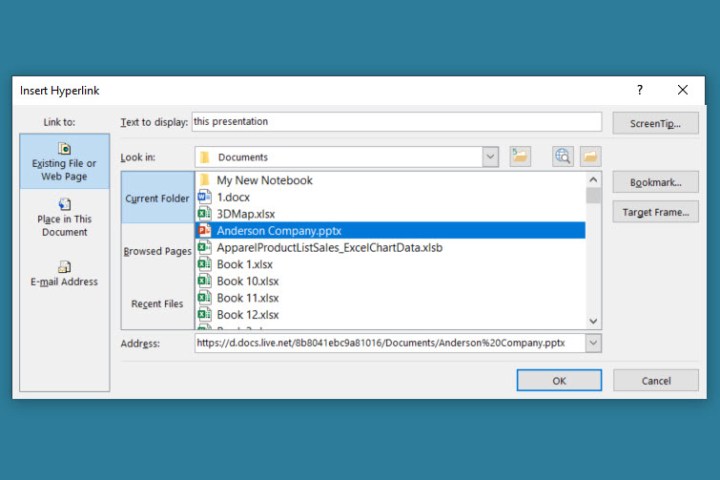
Image used with permission by copyright holder
Step 5: Select OK to apply the link to your text.
Step 6: You’ll then see the selected text in your document linked. When you select the link, the file should open.
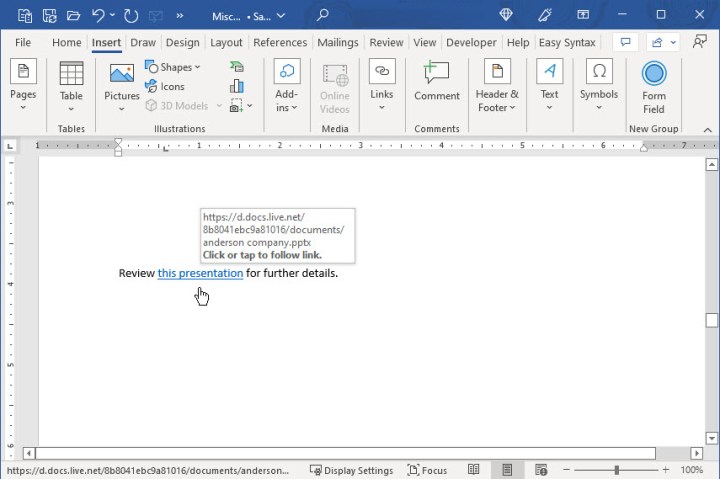
Image used with permission by copyright holder
Link to a place in the document
Another thing you didn’t know you could do in Word is link to particular sections of text for easy navigation. You can link to headings, bookmarks, or the top of the document.
Step 1: Select the text in your Word document that you want to link.
Step 2: Go to the Insert tab, select Links > Link, and pick Insert Link or right-click, move to Link and pick Insert Link.
Step 3: When the Insert Link window opens, choose Place in this document on the left.
Step 4: You’ll see a list of options on the right. If you don’t have any headings or bookmarks, you’ll only see the Top of the document option.
Select the document location you want to link to and pick OK to apply the link.
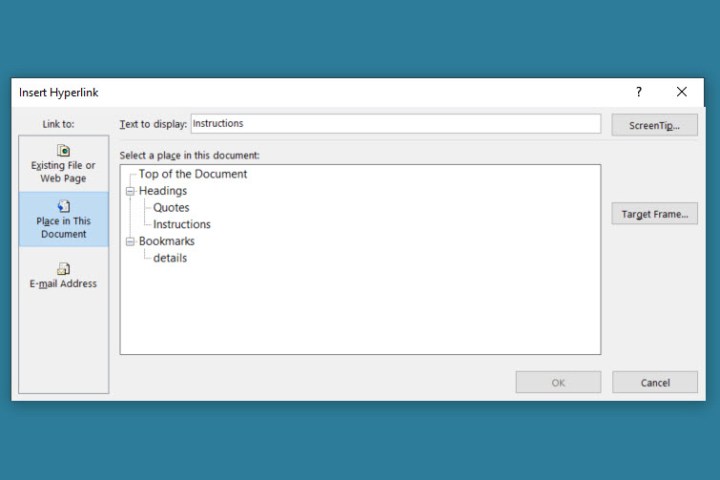
Image used with permission by copyright holder
Step 5: You’ll then see your selected text linked in your document. When you select the link, you should jump to that location in the document.
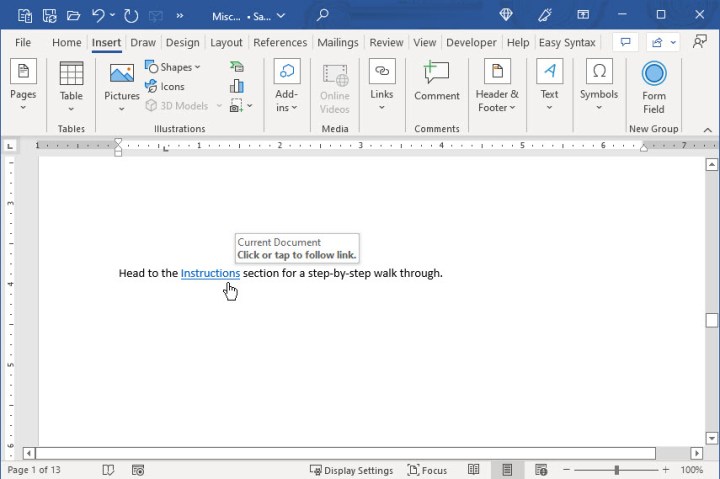
Image used with permission by copyright holder
Link to an email address
Maybe you have a list of contacts in your document or your own email address for readers to contact you. You can link to an email address and optionally include a subject line.
Step 1: Select the text in your Word document that you want to link.
Step 2: Go to the Insert tab, select Links > Link, and pick Insert Link or right-click, move to Link and pick Insert Link.
Step 3: When the Insert Link window opens, choose E-mail address on the left.
Step 4: In the Recently used e-mail addresses box, you may see the email address you want to use. If so, simply select it.
If you don’t see the email address in the list, enter it in the E-mail address box near the top.
Step 5: Optionally, include the Subject in that box. This automatically populates the email with that subject line, making it easier to spot in the recipient’s inbox.
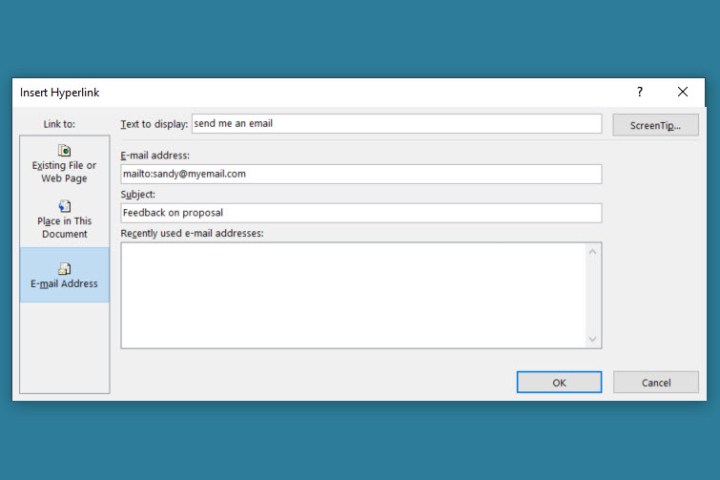
Image used with permission by copyright holder
Step 6: Select OK to apply the link to your text.
Step 7: You’ll then see the selected text in linked your document. When you select the link, a new message window should appear in your default email application.
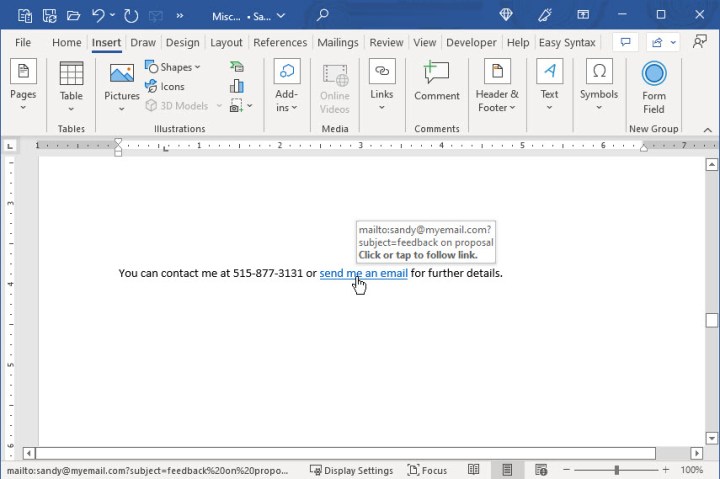
Image used with permission by copyright holder
Edit, copy, or remove a hyperlink in Word
The links you have inserted into your Word document remain clickable when you share it. This includes sharing a Word document converted to PDF.
After you add a link to your Word document, you may want to make a change or remove the link. You might also want an easy way to copy the link and paste it elsewhere rather than open it.
Right-click the link in the document and do one of the following:
- Select Edit hyperlink to make a change. This opens the same window you used to add the link.
- Pick Copy hyperlink to place the link on your clipboard. You can then paste it where needed.
- Choose Remove hyperlink to delete the link. Your text remains but becomes unlinked.
Whether you want to include a link for readers or just for yourself, it’s simple to do in Microsoft Word.
Now that you know how to add hyperlinks in Word, check out how to add a watermark or how to use headers and footers.

